Getting Started
Installation
.exe Installation for Windows (simple)
Executable files (for Windows) are made available for each release on GitHub.
Check out the latest GitHub releases here.
Download the SimplyFire zip file
Extract the contents of the zip file.
Within the SimplyFire root folder, locate SimplyFire.exe.
Run the executable file to begin the application.
That’s it!
Warning
Some users have reported slow startup of SimplyFire (load stuck at the splash screen).
If this happens, check the Task Manager to see if the memory usage for SimplyFire is increasing. After a complete load, SimplyFire should use about 100MB of RAM.
If you encounter this error, please report here. Please include the load log on the console (version>=0.3.3).
Supported systems:
Windows 10
Python Installation (advanced)
SimplyFire can be installed as a Python module through PyPI.
Install SimplyFire from PyPI using pip as follows:
$ pip install -i simplyfire
The package will be made available on the main PyPI database in the future for stable releases.
Once installed, run SimplyFire from any directory:
$ py -m simplyfire
SimplyFire is mainly a GUI-based software. However, the algorithms for analyses can be imported as packages and used in Python scripts.
Required Packages:
SimplyFire is dependent on the following packages (with tested version numbers):
numpy (>=1.21.5)
matplotlib (>=3.5.1)
pandas (>=1.3.5)
scipy (>=1.7.3)
pyyaml (>=6.0)
pyabf (>=2.3.5)
Earlier packages have not been tested, but they may still work.
Supported Systems:
The code has been developed on Windows 10.
While most of the code should work on any platform, some of the GUI event-handling and file read/write may be system specific.
OSX and Linux testers are welcome to submit system-specific issues!
Source Code (developer)
SimplyFire is entirely written in Python.
The source code can be found in the GitHub repository
Algorithm specific to a plugin are stored as separate submodules. These modules do not require the GUI component, and may be imported independently of the GUI application.
Supported Systems:
The code has been developed on Windows 10.
The GUI component may have system-specific code. The analysis modules should work independently of the system environment.
System-specific issues are welcome!
Using the software
GUI Layout
Upon startup, the software will look like this:
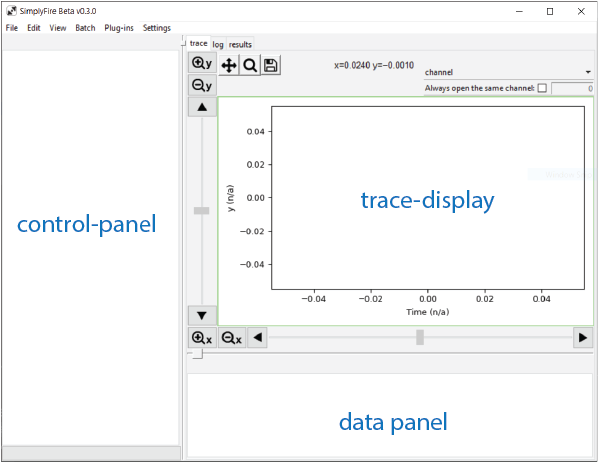
Default layout of the software.
- control-panel
Most plugins use this area to display buttons and parameter inputs. Multiple plugins can be opened at the same time, and they are displayed as separate tabs in the panel.
- trace-display
This area handles plotting of the recording data. Navigation tools are located around the plot.
- data-panel
Plugins for analysis will have a unique table that show up in this area to display the data.

Log-display
- log-display
Can be reached by selecting the
logtab beneath the trace-display. A log of activity while using the software can be found here. User annotations can also be added to the log. The details of the log can be saved in to a text file.
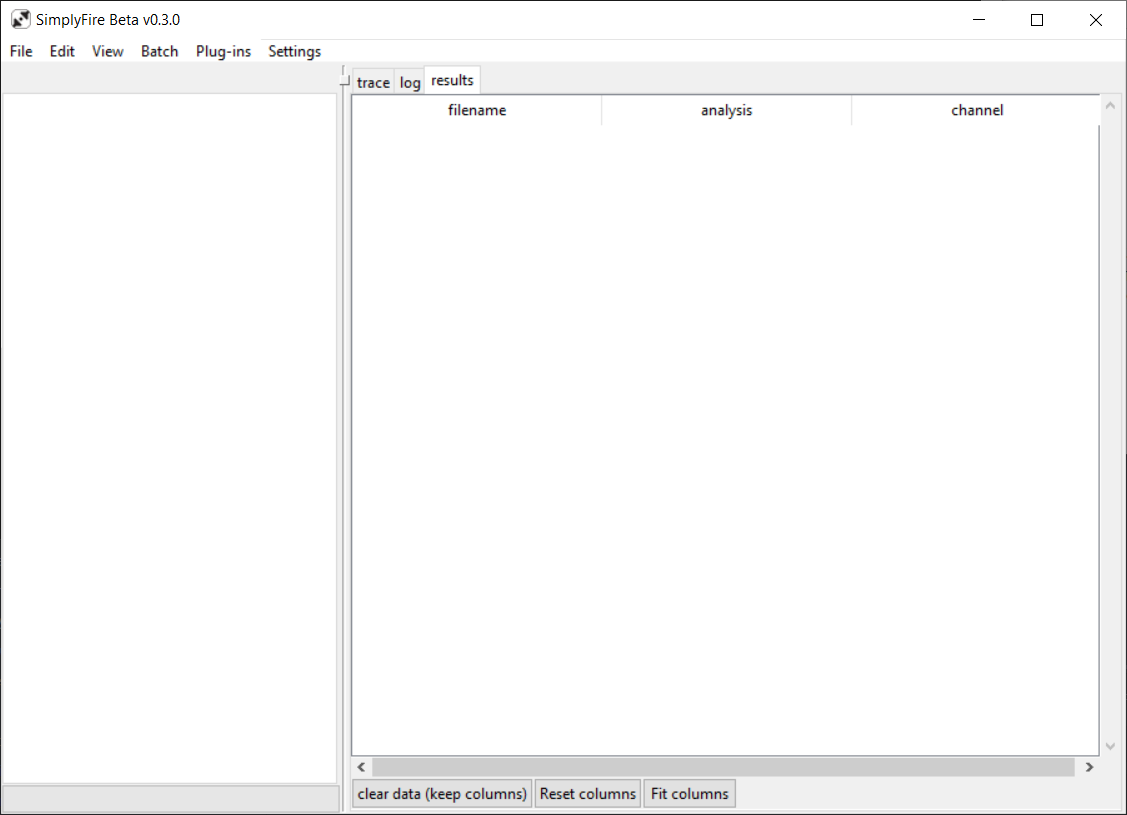
Results-display
- results-display
Summary of data from analyses may be entered here by various plugins. Typically, average and standard deviations of the data are reported.
Open a recording
SimplyFire can read files stored in .abf format.
Other file formats are currently not supported, but feature requests
are always welcome.
To open a new file, go to File menu -> Open Recording or press Alt+o.
Recording data from a single channel will be plotted on the graph-panel.
Change the channel displayed through the channel drop-down menu located
above the plot.
Tip
If the same channel is always analyzed, the channel selection process
can be skipped by checking the Always open the same channel check box
located above the plot. Enter the index of the channel to be accessed.
The channels are numbered starting from 0 (‘0-indexing’).
A recording can be shown in continuous mode or overlay mode.
To change the display mode, go to the View menu and select the desired mode.
- continuous
the recording is shown as a single trace. Each subsequent sweep is concatenated after the last. Mini analysis mode requires the recording to be in this mode.
- overlay
multiple sweeps are superimposed
Navigation Tools
Navigate the recording data by using the navigation buttons located around the plot. Both x- and y- axes have buttons to zoom in/out and pan. The y-axis scrollbar controls the position of the left-most visible datapoint in the y-axis. The x-axis scrollbar controls the visible x-axis window relative to the entire recording.
The following keyboard shortcuts are available to navigate the plot:
- w/a/s/d keys
Pan the x- and y-axes
- i/j/k/l keys
Zoom the x- and y-axes
Several matplotlib tools are available above the plot for navigation.
 pan/zoom
Left click and drag to move the trace.
Right click and drag to zoom the axes
Toggle on/off using c while trace-display has focus.
 zoom to rect
Click and drag to draw a rectangle.
Left click and drag to zoom in.
Right click and drag to zoom out.
Toggle on/off using v while trace-display has focus.
 save figure
Saves the visible plot as an image file.
Everything that is visible on the plot, including markers from plugins will be saved. Vector image file format is available for making figures for publication.
Analysis
Other navigation, data-processing, and analysis options are available via various plugins.
All GUI-based plugins are hidden by default.
To make them visible, go to Plug-ins menu -> click on the
desired plugin name.
Plugins that require user-input will typically have a form appear
in the control-panel, located on the left-hand side of the application.
Use the tabs in the control-panel to navigate between various plugins.
Check out the Workflows section for primers on analysis methods. Check out the Plugins (GUI) section for details on each plugin.
Plugins
Plugins can be turned off/on.
By default, all of the plugins in the package are turned on.
To control which plugins are in use, go to Plug-ins menu -> Manage plug-ins.
Toggle the check box for each plugin and click on Apply.
Restart the software to reflect the changes.
Custom and external plugins can be added to the plugins folder located within the software data directory.